OpenStack git-Review-Setup
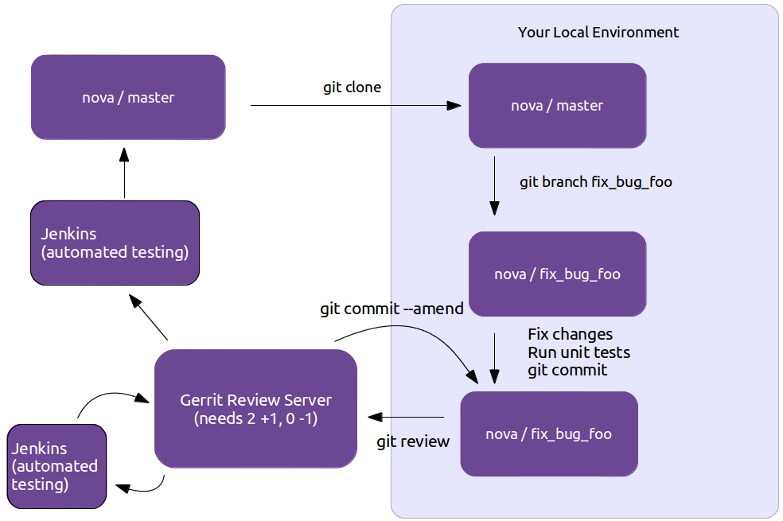
Gerrit Workflow
First thing to do when contributing to Openstack is familiarize yourself with their git-review system and to set-up your environment.

I’m running Centos 7 and these are the steps I followed: -First sign up for a Launchpad account, this is how the Web interface for the Gerrit code review system will identify you. It’s also useful for automatically crediting bug fixes to you when you address them with your code commits. -Next join The OpenStack Foundation(it’s free and required for all code contributors).Among other privileges, this also allows you to vote in elections and run for elected positions within The OpenStack Project. When signing up for Foundation Membership, make sure to give the same E-mail address you’ll use for code contributions, since this will need to match your preferred E-mail address in Gerrit.
- Visit https://review.openstack.org/ and click the Sign In link at the top-right corner of the page. Log in with your Launchpad ID.
- Because Gerrit uses Launchpad OpenID single sign-on, you won’t need a separate password for Gerrit, and once you log in to one of Launchpad, Gerrit, or Jenkins, you won’t have to enter your password for the others.
- You’ll also want to upload an SSH key while you’re at it, so that you’ll be able to commit changes for review later.
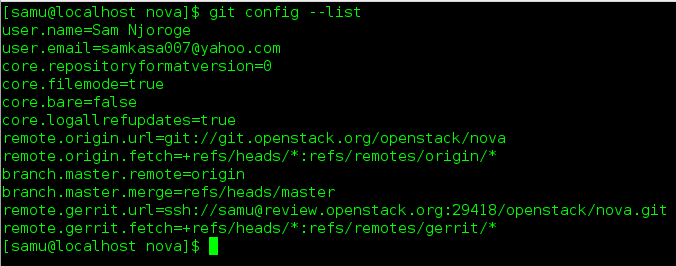
- Ensure that you have run these steps to let git know about your email address:

-To check your git configuration

Git Review Installation
-I ran pip install git-review on my Centos 7 installation

Project Setup
- Once you have chosen the OpenStack project to contribute to, you’ll clone it the usual way, for example:

- You may want to ask git-review to configure your project to know about Gerrit at this point. If you don’t, it will do so the first time you submit a change for review, but you probably want to do this ahead of time so the Gerrit Change-Id commit hook gets installed. To do so

-
Git-review checks that you can log in to gerrit with your ssh key. It assumes that your gerrit/launchpad user name is the same as the current running user. If that doesn’t work, it asks for your gerrit/launchpad user name. If you don’t remember the user name go to the settings page on gerrit to check it out (it’s not your email address).
-
Note that you can verify the SSH host keys for review.openstack.org here: https://review.openstack.org/#/settings/ssh-keys
-
If you get the error “We don’t know where your gerrit is.”, you will need to add a new git remote. The url should be in the error message. Copy that and create the new remote.

-
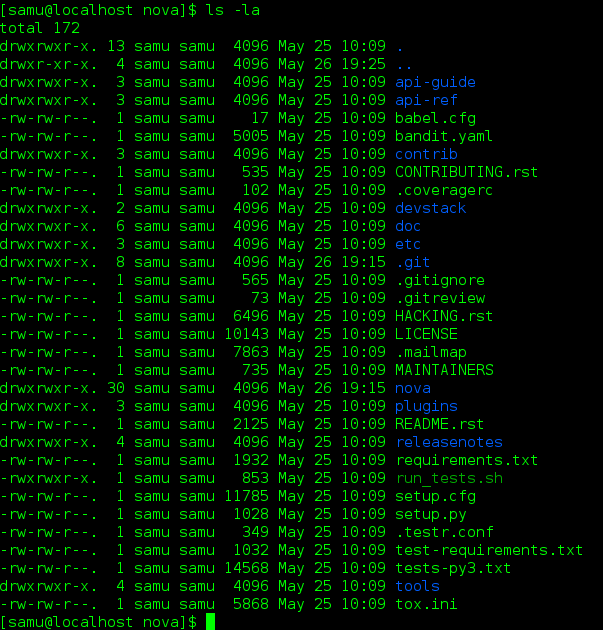
In the project directory, you have a .git hidden directory and a .gitreview hidden file. You can see them with:

Normal Workflow
- Once your local repository is set up as above, you must use the following workflow.
-
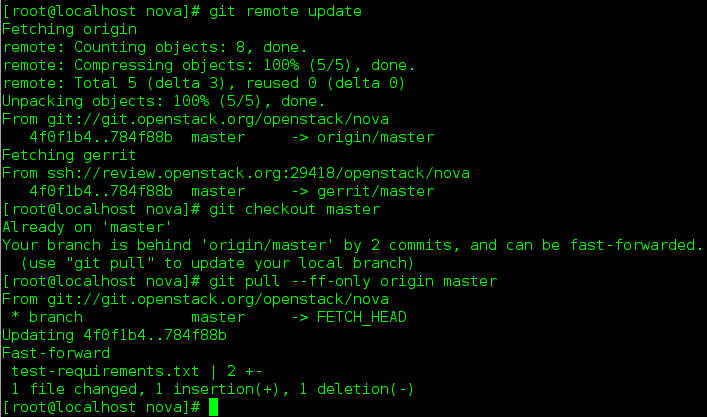
Make sure you have the latest upstream changes by running the following commands
  git remote update
  git checkout master
  git pull --ff-only origin master

- Create a topic branch to hold your work and switch to it. If you are working on a blueprint, name your topic branch bp/BLUEPRINT where BLUEPRINT is the name of a blueprint in launchpad (for example, “bp/authentication”). The general convention when working on bugs is to name the branch bug/BUG-NUMBER (for example, “bug/1234567”). Otherwise, give it a meaningful name because it will show up as the topic for your change in Gerrit.

- To generate documentation artifacts, navigate to the directory where the pom.xml file is located for the project and run the following command:

Committing Changes
- Git commit messages should start with a short 50 character or less summary in a single paragraph. The following paragraph(s) should explain the change in more detail.
-
If your changes addresses a blueprint or a bug, be sure to mention them in the commit message using the following syntax:
Implements: blueprint BLUEPRINT Closes-Bug: ####### (Partial-Bug or Related-Bug are options) -
For example:
Adds keystone support ...Long multiline description of the change... Implements: blueprint authentication Closes-Bug: #123456 Change-Id: I4946a16d27f712ae2adf8441ce78e6c0bb0bb657 -
Note that in most cases the Change-Id line should be automatically added by a Gerrit commit hook that you will want to install. See Project Setup for details on configuring your project for Gerrit. If you already made the commit and the Change-Id was not added, do the Gerrit setup step and run:
git commit --amend -
The commit hook will automatically add the Change-Id when you finish amending the commit message, even if you don’t actually make any changes.
-
Make your changes, commit them, and submit them for review:
git commit --a git review -
Caution: Do not check in changes on your master branch. Doing so will cause merge commits when you pull new upstream changes, and merge commits will not be accepted by Gerrit.
- Prior to checking in make sure that you run “tox”.
